
Most people recognize a few of the common safety symbols, but there’s a complete system behind the red-bordered diamonds you see on chemical containers. These OSHA pictograms are part of a global standard designed to make hazard warnings consistent and instantly understandable, no matter where you are. A truly effective safety program, however, requires more than just putting the right sticker on a barrel. It’s about ensuring every member of your team understands what those symbols mean and how to react. This guide goes beyond a simple definition chart to cover training, common mistakes, and how to build a comprehensive safety communication strategy.
Key Takeaways
- Master the Visual Language of Safety: OSHA pictograms are a standardized system for immediate hazard recognition. Each of the nine symbols communicates a specific danger, allowing your team to identify risks at a glance without reading text.
- Follow the Design Rules for Compliance: Using pictograms correctly means adhering to the strict, non-negotiable design standards—a black symbol on a white background inside a red diamond border—on all chemical labels and Safety Data Sheets.
- Turn Symbols into Action with Training: A safe workplace requires more than just signs; it needs understanding. Build a safety program that includes ongoing training so every employee knows what each pictogram means and how to respond appropriately.
What Are OSHA Pictograms and Why Do They Matter?
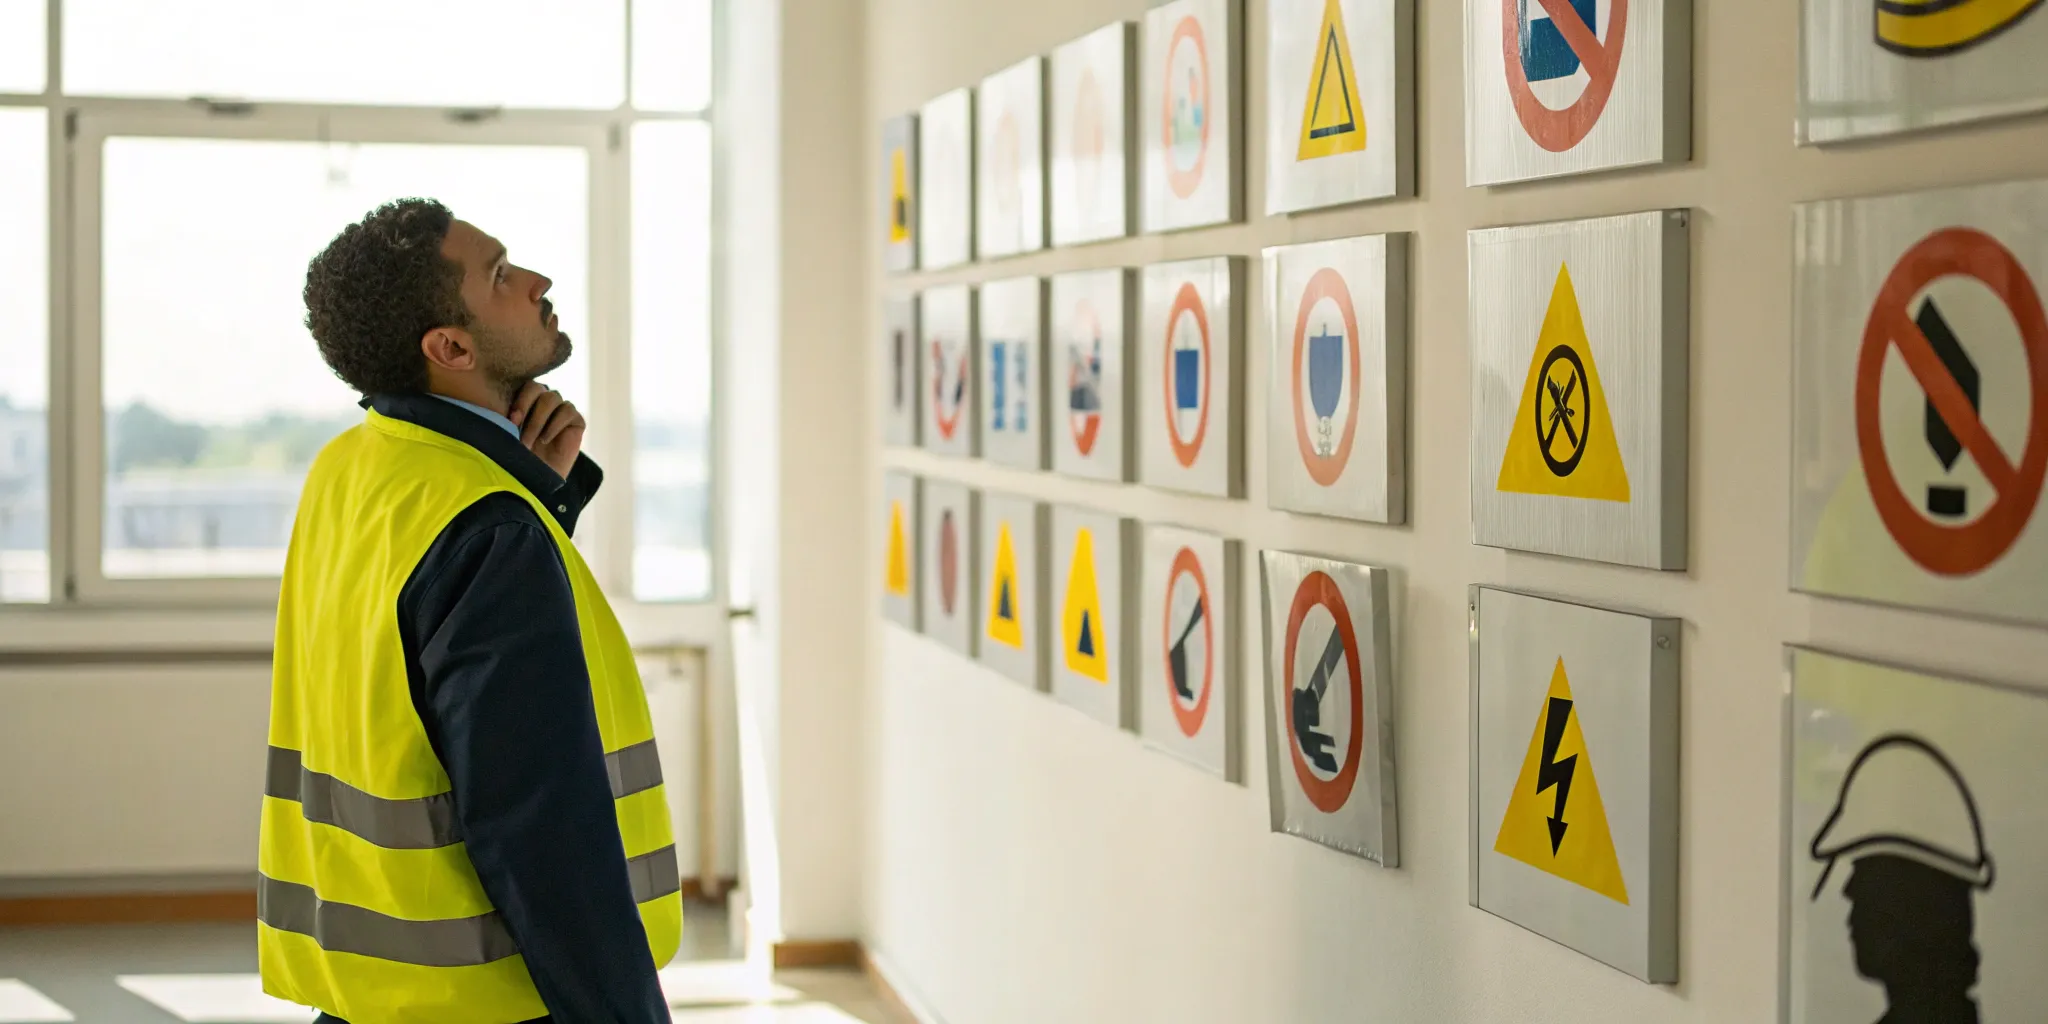
Think of OSHA pictograms as the universal warning signs for chemical hazards in your workplace. At their core, they are simple pictures inside a distinct red diamond shape, designed to show the specific dangers of a chemical at a single glance. You’ve likely seen them on containers and are probably familiar with the skull and crossbones, but there are nine official symbols in total, each representing a different type of hazard.
These symbols are a key part of OSHA’s Hazard Communication Standard (HCS), a set of rules designed to ensure that information about chemical and toxic substance hazards is available and understandable to workers. The goal is straightforward: to give everyone the information they need to work safely. By placing a clear, visual warning directly on a chemical container, pictograms caution users about the potential hazards they may be exposed to. This visual-first approach is crucial for immediate hazard recognition, making your safety protocols more effective and your team better informed. Getting these symbols right on your labels and signs is the first step toward a safer work environment.
How Pictograms Keep Your Workplace Safe
The real power of pictograms lies in their simplicity. These symbols are designed to help people quickly understand the dangers of the chemicals they are working with, often without needing to read a single word of text. This is especially important in fast-paced environments or in workplaces with a multilingual team, as the images transcend language barriers.
This system is part of a global effort to make chemical safety information clear and consistent, no matter where you are. By standardizing the symbols for specific hazards—like flammability, corrosion, or toxicity—the system helps prevent confusion and reduces the risk of accidents. When everyone recognizes the same symbol for the same danger, it keeps the entire team safer.
What the Law Requires: The Hazard Communication Standard
Under OSHA regulations, using pictograms isn’t just a good idea—it’s the law. The Hazard Communication Standard requires chemical manufacturers, importers, and distributors to ensure every container of hazardous chemicals is clearly labeled with specific information before it enters the workplace. This includes the product identifier, a signal word (like “Danger” or “Warning”), hazard and precautionary statements, and of course, the appropriate pictogram(s).
The design of these pictograms is also strictly defined. Each one must be in the shape of a square set on a point (a diamond) and feature a black hazard symbol on a white background with a red frame. The frame has to be wide enough to be clearly visible. There’s no room for creative interpretation here; compliance depends on getting these visual details exactly right, which is why professional, high-quality safety signage is so important.
What Do the 9 OSHA Pictograms Mean?
Think of OSHA’s nine pictograms as a universal visual language for chemical safety. Each simple image, set inside a red diamond, quickly communicates a specific type of hazard. Understanding them is the first step toward handling, storing, and labeling chemicals correctly. When these symbols are printed clearly on high-quality labels and signs, they give your team the at-a-glance information they need to work safely and prevent accidents. This system isn’t just about following rules; it’s about creating a safer environment where everyone can instantly recognize potential dangers without having to read lengthy text. Let’s walk through what each of the nine pictograms represents, breaking them down into three main categories: health, physical, and environmental hazards.
Health Hazard Pictograms
This is a big one. The Health Hazard pictogram, which looks like a person’s silhouette with a starburst on the chest, signals some of the most serious, long-term health risks. If you see this symbol, the chemical could be a carcinogen (cause cancer), a mutagen (cause genetic defects), or have reproductive toxicity. It also warns of respiratory sensitization, target organ toxicity, and aspiration toxicity. Essentially, this symbol means a substance can cause significant, lasting damage to your health. Common examples of materials that require this pictogram include asbestos and arsenic, highlighting the severe nature of the warning.
Physical Hazard Pictograms
This group covers chemicals that pose a direct physical threat through fire, explosion, or other dangerous reactions. There are seven pictograms in this category:
- Flame: This one is pretty straightforward. It means the chemical is flammable, may ignite on its own, or emits a flammable gas. Think of substances like gasoline or propane.
- Flame Over Circle: This symbol indicates an oxidizer. Oxidizers can cause or intensify a fire or trigger an explosion. Hydrogen peroxide is a common example.
- Exploding Bomb: This pictogram warns of explosion or self-reactivity hazards. Nitroglycerin is a classic example of a substance that would carry this symbol.
- Gas Cylinder: You’ll see this on containers of gas under pressure, like oxygen or helium tanks. These can explode if heated or rupture if dropped.
- Corrosion: This symbol shows a substance that can cause severe skin burns and eye damage or corrode metals. Sulfuric acid is a prime example.
- Skull and Crossbones: This is the universal sign for acute toxicity. A substance with this label can be fatal or highly toxic if swallowed, inhaled, or it touches your skin.
- Exclamation Mark: This is a general alert for less severe hazards. It can indicate that a substance is an irritant to the skin or eyes, a skin sensitizer, or may cause dizziness. Many household cleaners like bleach fall into this category. You can find a complete guide to these pictograms to help with employee training.
Environmental Hazard Pictograms
The Environment pictogram, showing a dead tree and fish, is unique because its use is not mandatory under OSHA’s standard. However, it is often included to align with the Globally Harmonized System (GHS). This symbol indicates that the chemical is toxic to aquatic life and can cause lasting damage to the environment. While OSHA doesn’t require it on labels in the U.S., seeing it is a clear warning to follow proper disposal procedures to prevent environmental contamination. You can learn more about hazard symbols and their specific requirements to ensure your workplace is fully informed and protected.
Pictogram Rules for Labels and Safety Data Sheets
Knowing what each pictogram means is the first step, but using them correctly is just as crucial for maintaining a safe and compliant workplace. OSHA has specific guidelines for how these symbols should appear on your labels and Safety Data Sheets (SDS). Following these rules isn’t just about checking a box; it’s about ensuring that hazard information is clear, consistent, and easy to spot at a glance. When your team can instantly recognize a warning, they can react appropriately.
Getting these details right on your printed materials is essential. From durable labels to clear safety signs, having professionally produced essential safety solutions ensures every pictogram is sharp, visible, and compliant. Let’s walk through the key rules for placement, sizing, and documentation so you can feel confident that your safety materials are doing their job effectively.
Correct Label Placement and Sizing
When it comes to labels, looks matter. OSHA’s rules are very specific to make sure pictograms are impossible to miss. Each symbol must be in a diamond shape—technically a square set on its point. Inside the diamond, you’ll have the black hazard symbol on a plain white background. The whole thing is framed with a bold red border that needs to be wide enough to be clearly visible. This isn’t just for style; the distinct red diamond is designed to catch the eye immediately, signaling that a hazard is present. When you’re creating your labels, make sure they follow this format precisely for full compliance.
Adding Pictograms to Safety Data Sheets
Your safety communication doesn’t stop with the label on the container. Pictograms also play a key role in your Safety Data Sheets (SDS). According to OSHA’s Hazard Communication Standard, Section 2 of any SDS must identify the relevant hazards. This means you need to either show the actual pictograms or list them by name, like “flame” or “skull and crossbones.” This ensures that anyone reviewing the detailed safety sheet can quickly connect the information back to the symbol they see on the product label, creating a seamless and easy-to-understand safety system.
Using Pictograms Consistently
Consistency is the key to effective communication, especially when it comes to safety. The whole point of the Globally Harmonized System (GHS), which these pictograms are part of, is to create a single, clear standard for everyone to follow. Using the pictograms consistently across all your labels, Safety Data Sheets, and training materials reinforces their meaning and helps your team internalize the information. When the “flame” symbol always looks the same and always means the same thing, there’s no room for confusion. This universal approach helps keep everyone safer by making hazard information predictable and instantly understandable, no matter the context.
How Are OSHA Pictograms Different From Other Safety Symbols?
You’ve probably seen dozens of different safety signs throughout your career, from simple “Wet Floor” signs to complex chemical warnings. While they all aim to keep you safe, OSHA pictograms are in a class of their own. They aren’t just random symbols; they are part of a highly specific and regulated system designed for instant, universal understanding. Unlike general warning signs that can vary in design, color, and shape depending on the facility, OSHA pictograms follow strict rules that make them immediately recognizable anywhere you see them.
These symbols are a critical component of workplace safety, especially when dealing with hazardous materials. Their unique design and global standardization ensure that every employee, regardless of their role or native language, can identify a potential danger at a glance. This isn’t just about following rules; it’s about clear communication when it matters most. Getting these symbols right is non-negotiable, which is why clear, compliant, and durable safety signage is a must-have for any responsible business. Understanding what sets these pictograms apart is the first step toward building a safer work environment for your team.
The Global Standard: GHS Alignment
One of the biggest things that makes OSHA pictograms unique is their connection to a worldwide system. They are a core part of the Globally Harmonized System (GHS), an international standard for classifying and labeling chemicals. Before the U.S. fully adopted GHS, hazard warnings could look very different depending on the manufacturer or country of origin. Now, the system ensures that a chemical hazard is communicated the same way in Portland as it is in Paris. This global alignment simplifies safety for companies that use international suppliers and helps create a consistent safety culture for an increasingly diverse workforce.
The Red Diamond Design Standard
You can spot an OSHA pictogram by its distinct look. Each one is a black symbol on a white background, enclosed within a red, diamond-shaped border. This isn’t just a stylistic choice—it’s a rule. The red frame is designed to catch your eye and signal a significant hazard. This uniform design makes the pictograms stand out from other types of safety symbols, which might use different shapes or colors to convey caution, general warnings, or simple information. When you see that red diamond, you know you’re looking at a GHS-standardized hazard that requires your immediate attention and respect.
A Universal Language for Safety
At their core, OSHA pictograms work because they are a visual language that everyone can understand. The images used are designed to quickly communicate specific dangers—like a flame for flammability or a skull and crossbones for acute toxicity. This visual approach cuts through language barriers, making it an incredibly effective tool for multilingual workplaces. Instead of needing to read and interpret text in a high-pressure situation, an employee can instantly recognize the type of risk they are facing. This immediate comprehension is crucial for preventing accidents and ensuring everyone on your team can work safely.
How to Use OSHA Pictograms in Your Safety Program
Pictograms are powerful tools, but they only work if you use them correctly. Putting a sticker on a container is just the first step. To truly protect your team and stay compliant, you need to build these visual warnings into a comprehensive safety program. This means making sure everyone understands what they mean, connecting them to your existing safety rules, and developing a clear strategy for how and where you display them. Let’s walk through how to make pictograms an active part of your workplace safety culture.
Train Your Employees on Pictogram Meanings
Your team can’t act on warnings they don’t understand. That’s why effective, ongoing training is the foundation of any successful safety program. Every employee who works with or near hazardous chemicals must be trained to recognize each pictogram and understand the specific dangers it represents. A one-time session during onboarding isn’t enough. Regular refresher training keeps this critical information top of mind and ensures everyone, from new hires to seasoned veterans, can quickly identify hazards. You can find helpful resources and training requirements directly from OSHA’s Hazard Communication Standard. This consistent reinforcement is key to building a culture where safety is second nature.
Integrate Pictograms with Existing Safety Rules
Pictograms don’t exist in a vacuum; they are a key component of your overall Hazard Communication Program. Your company should have a written plan that outlines how you manage chemical safety, and pictograms should be a seamless part of it. This includes maintaining an accurate inventory of all hazardous chemicals on-site and ensuring every container is properly labeled. When you treat pictograms as an integral piece of your safety procedures—right alongside rules for personal protective equipment (PPE) and emergency response—you create a stronger, more cohesive system. This approach ensures that the visual warnings on labels directly connect to the detailed information in your Safety Data Sheets (SDS) and workplace protocols.
Develop a Clear Signage Strategy
Consistency is crucial for an effective visual safety system. Your signage strategy should ensure that every label is clear, easy to read, and placed correctly on containers. According to OSHA, each label must include the product identifier, a signal word, hazard and precautionary statements, and the appropriate pictograms. Using durable, high-quality materials for your labels and signs prevents them from fading, peeling, or becoming illegible in tough working conditions. Partnering with a professional printer for your custom safety signs and labels ensures they meet compliance standards and hold up over time, keeping your team informed and your workplace safe.
Common Misconceptions About OSHA Pictograms
When it comes to workplace safety, getting the details right is essential. OSHA’s rules can seem complex, and it’s easy for myths and misunderstandings to spread. Let’s clear up a few common misconceptions about pictograms so you can be confident your safety program is on the right track. Getting these symbols right isn’t just about avoiding fines—it’s about giving your team the clear, immediate information they need to stay safe on the job.
Myth: Pictograms Are Optional
Let’s tackle the biggest myth first: pictograms are absolutely not optional. They are a required and fundamental part of chemical labeling under OSHA’s Hazard Communication (HazCom) Standard. In fact, failing to have a compliant written plan and proper labels is one of the most common violations cited by OSHA inspectors. If you handle, store, or use hazardous chemicals, you must use the correct pictograms on your labels and safety data sheets. Think of them as non-negotiable elements of your workplace safety communication, just as important as any other piece of required safety signage.
Myth: All Pictograms Have Similar Meanings
It can be tempting to lump all safety warnings together, but each of the nine OSHA pictograms has a very specific meaning. The skull and crossbones, for example, indicates acute toxicity (fatal or toxic), which is a much different and more immediate danger than the health hazard pictogram, which warns of long-term effects like carcinogenicity. Even with periodic updates to the standard, the core meanings of these symbols don’t change. That’s why proper training is so important—your employees need to be able to distinguish between them at a glance to understand the exact nature of the risk they’re facing.
Myth: You Can Alter Pictogram Designs
The design of an OSHA pictogram is not open to creative interpretation. Each symbol must be enclosed in a red diamond-shaped border. You can’t print it in black and white to save on ink or change the border to blue to match your company branding. OSHA is very clear that the red border is a key feature for effectively communicating hazards and making the warning stand out. This standardization ensures that the symbols are universally recognizable, no matter where an employee works. When creating labels or signs, always stick to the official design to maintain compliance and clarity.
Common Challenges with Pictogram Implementation
While OSHA pictograms are designed for at-a-glance understanding, putting them into practice across your business isn’t always a simple copy-and-paste job. Many businesses run into a few common hurdles that can compromise safety and lead to compliance issues. From ensuring your team understands the symbols to keeping your labeling consistent, these challenges require a thoughtful strategy.
The good news is that these obstacles are entirely manageable. By anticipating them, you can create a clear plan to integrate pictograms effectively, making your workplace safer for everyone. It’s about more than just sticking a label on a container; it’s about building a comprehensive safety communication system that your entire team can rely on. Let’s walk through some of the most frequent challenges and how you can handle them.
Overcoming Training Gaps
Pictograms are only effective if your employees know what they mean. A major challenge is the training gap—the space between displaying a symbol and ensuring every worker understands the specific hazard it represents. According to OSHA’s Hazard Communication Standard, workers must be trained to recognize and understand pictograms. This isn’t a one-time task; ongoing training is key to keeping safety knowledge fresh. You can find training resources to help your team learn at their own pace, ensuring everyone meets compliance requirements and, more importantly, knows how to stay safe on the job.
Labeling Multi-Hazard Chemicals
What happens when a single chemical presents multiple dangers? This is a common scenario and a frequent point of confusion. For example, a substance could be both flammable and toxic. In these cases, the label must include a pictogram for each distinct hazard. The challenge is to present this information clearly without cluttering the label or overwhelming the employee. Your safety data sheets (SDS) will specify which pictograms are required. The key is to have a clear, standardized labeling format that your team is trained to read and understand, even when multiple symbols are present.
Maintaining Consistency Across Your Business
For businesses with multiple teams, departments, or locations, maintaining consistency is a huge challenge. When one department uses slightly different labels than another, it can create confusion and increase the risk of accidents. Tight budgets and competing priorities often make it difficult to standardize safety signage. However, improper or inconsistent signs can lead to serious OSHA violations and put your team at risk. Working with a single printing partner for all your essential safety solutions can help ensure every sign and label is uniform, durable, and fully compliant.
Where to Find and Download Official OSHA Pictograms
Once you understand what each pictogram means, the next step is to use them correctly in your workplace. This means sourcing the official, high-quality images and following the specific guidelines for how they should look on your labels and signs. Fortunately, OSHA makes it straightforward to find exactly what you need to stay compliant and keep your team informed. Using the right symbols in the right format is a non-negotiable part of the Hazard Communication Standard, ensuring that the visual warnings are consistent and universally understood.
Official OSHA Resources and Tools
The single best place to get official pictograms is directly from the source. The Occupational Safety and Health Administration provides a dedicated page where you can download all nine pictograms for free. Using these official files ensures you are working with the most accurate and up-to-date versions that meet federal standards. This eliminates any guesswork and protects your business from using incorrect or outdated symbols. Think of the OSHA website as your official library for hazard communication—it’s the most reliable resource for keeping your safety materials compliant and your team safe.
Approved Formats and Specifications
When you download the pictograms, you’ll notice they come in a few different file types. For professional printing of durable labels and large signs, you’ll want to use the EPS files, as they can be scaled to any size without losing quality. For digital use or smaller in-house printing, JPG or PNG files work well. Beyond the file type, the design itself has strict rules: each pictogram must be on a white background, feature a black symbol, and be framed by a red border in the shape of a square set on its point (a diamond). These specifications are mandatory for creating compliant essential safety solutions for your workplace.
How to Create an Effective Pictogram Training Program
Displaying the correct pictograms is a great first step, but a truly safe workplace depends on your team’s ability to understand and act on them. An effective training program bridges the gap between seeing a symbol and knowing exactly what to do to stay safe. Building a program that sticks doesn’t have to be complicated. It’s all about delivering clear information, checking for understanding, and keeping your resources up to date.
Best Practices for Training Your Team
Under OSHA’s rules, training your team on hazard communication isn’t optional—it’s a requirement. The best programs use a mix of methods to keep employees engaged. Think beyond a simple lecture. You can use videos, online modules, and hands-on demonstrations to explain what each pictogram means in a practical context. Focus on the specific chemicals your team actually works with to make the information relevant. When employees can connect a pictogram to a substance they handle every day, the safety lesson is much more likely to sink in. The goal is to meet compliance requirements while genuinely preparing your team for real-world situations.
Test for Comprehension and Retention
Safety knowledge isn’t something you can set and forget. Because people forget things over time, regular refreshers are key to keeping pictogram meanings top of mind. You can test for comprehension in simple, low-pressure ways. Try short quizzes during team meetings, walk through a Safety Data Sheet (SDS) together, or present a scenario and ask how the team would react based on a container’s label. Frequent training serves as a consistent reminder of what the symbols mean and reinforces the correct safety protocols. The ultimate goal is to ensure every employee can read a label, understand the risks, and react to hazards appropriately without hesitation.
Keep Training Materials Current
Your training program is only as good as the information it’s based on. It’s crucial to keep your training materials aligned with your current chemical inventory. When a new chemical is introduced to the workplace, your training, labels, and signage need to be updated immediately. Maintaining an accurate inventory is the foundation for all your other safety measures. As your needs change, make sure your team has the most current essential safety solutions to work with. Remember, every label must clearly show the product identifier, signal word, hazard statements, and the correct pictograms to comply with OSHA’s Hazard Communication Standard.
How to Stay Compliant with OSHA Requirements
Understanding OSHA pictograms is a huge step, but compliance doesn’t stop there. Maintaining a safe workplace is an ongoing process that protects your team and your business. Think of it as a continuous cycle of checking, documenting, and learning. By building a few key habits into your operations, you can make sure your safety program is always effective and up to date, giving you peace of mind and keeping your employees safe from harm.
Conduct Regular Audits and Updates
A safety audit is just a formal way of saying, “Let’s walk around and make sure everything is still safe.” Set a recurring date on your calendar to review your workplace. Check that all chemical containers are properly labeled, safety signs are clean and visible, and your team has easy access to Safety Data Sheets (SDS). This proactive approach is about catching small issues before they become big problems. As OSHA notes, businesses with effective safety programs can “significantly reduce injuries and illnesses and reduce the costs associated with these injuries.” If you find that your old signs are worn out or you need new ones, getting updated safety materials is a simple fix that makes a big difference.
Know Your Record-Keeping Duties
Good documentation is your best friend when it comes to compliance. Your main responsibility here falls under OSHA’s Hazard Communication Standard (HCS). The HCS requires that every container of hazardous chemicals is clearly marked with a “product identifier; signal word; hazard statement(s); precautionary statement(s); and pictogram(s).” This means you need a solid system for labeling everything that comes into your facility and everything you mix or transfer into a new container. Beyond labels, you must also maintain an organized library of SDSs for every chemical and keep records of employee safety training. This paper trail proves you’re doing your due diligence to keep everyone informed and safe.
Stay Current with Regulatory Changes
OSHA standards evolve, so it’s important to stay informed. Don’t worry—this doesn’t mean you have to read dense legal documents every week. Simply subscribing to the OSHA newsletter or following a reputable safety organization can keep you in the loop. For example, a recent update to the HCS in 2024 caused some confusion, but as experts at OSHA Training clarified, the update “did not: Add new types of label elements; Add new pictograms; Change existing pictograms.” Knowing the specifics of these changes helps you avoid unnecessary work while ensuring you remain compliant. A little bit of reading now and then can save you a major headache later.
Related Articles
- Essential Safety Solutions | Printworks | We’ve got you covered!
- Packages | Printworks | We’ve got you covered!
- Covid Signage | Printworks | We’ve got you covered!
- /resources/EssentialRounded_SafetySolutionStations_SpecSheet.pdf | Printworks | We’ve got you covered!
- Phosphorus COVID-19 RT-qPCR Test | Printworks | We’ve got you covered!
Frequently Asked Questions
Do I need a pictogram for every single chemical in my workplace? Not necessarily for every substance, but you do need one for any chemical that OSHA classifies as hazardous. The best way to know for sure is to check the Safety Data Sheet (SDS) that comes from the manufacturer. Section 2 of the SDS will tell you exactly which hazards are present and which pictograms are required for the label.
What’s the real difference between the ‘Exclamation Mark’ and the ‘Skull and Crossbones’ pictograms? Think of it as a matter of severity. The Skull and Crossbones is reserved for the most severe, immediate dangers, indicating a chemical that can be fatal or highly toxic if it enters your body. The Exclamation Mark is used for less severe, though still significant, hazards. It can mean the substance is an irritant, a skin sensitizer, or has other harmful effects that aren’t immediately life-threatening.
Can I just print my own chemical labels on a standard office printer? While it might seem like a quick fix, it’s generally not a good long-term solution. Workplace labels need to be tough enough to resist smudging, fading, and damage from spills or moisture. A standard paper label can quickly become illegible, which is a safety risk and a compliance violation. Using durable, professionally printed labels ensures your warnings stay clear and intact.
What do I do if a single chemical has multiple different hazards? This is a common situation, and the rule is straightforward: the label must include a pictogram for each distinct hazard. For example, if a chemical is both flammable and corrosive, you would need to display both the Flame pictogram and the Corrosion pictogram. The goal is to give a complete and accurate picture of all the potential risks at a single glance.
How often should I retrain my team on what these pictograms mean? OSHA requires you to train employees so they understand the hazards, but it doesn’t set a strict annual schedule. The most effective approach is to provide refresher training regularly to keep the information top of mind. It’s also essential to conduct training whenever a new chemical hazard is introduced into the workplace. Consistent reinforcement is what builds a strong safety culture.