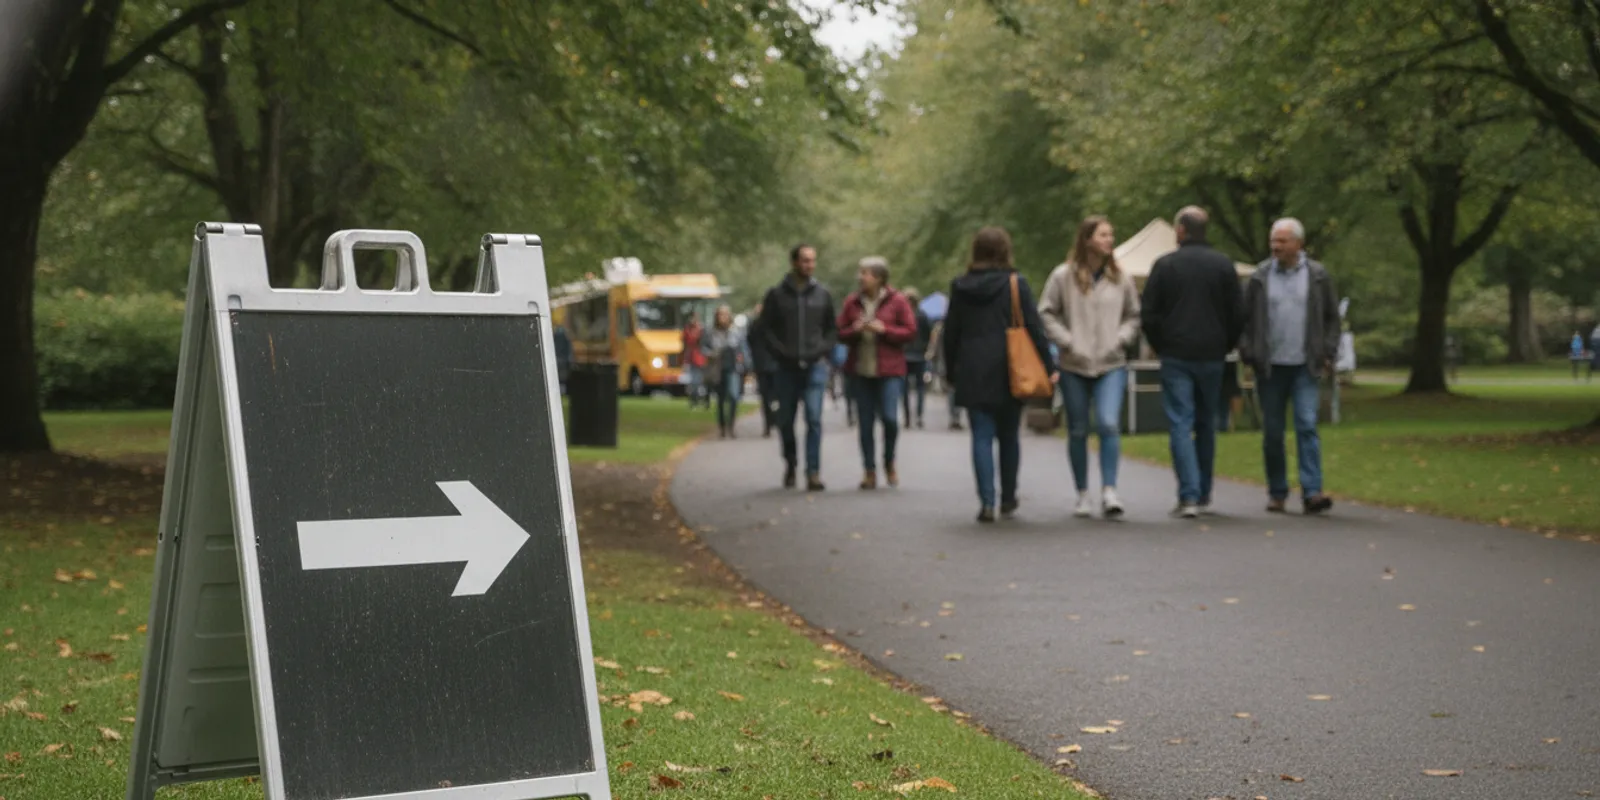
When an event has several entrances, activity areas, or pedestrian routes, custom metal A-frame signs can help visitors make decisions at a glance. The right sign plan is about more than choosing a frame: organizers need to compare placement, message clarity, stability, visibility, accessibility, and the time available for production. A little planning makes temporary wayfinding easier to follow and simpler to install.
Discuss your event sign project
What should event wayfinding accomplish?
Wayfinding helps people understand where they are, where they need to go, and what action to take next. At an event, this may mean directing guests from a public entrance to check-in, indicating the route to a performance area, or identifying a temporary walkway around a closed section. Each sign should solve one immediate navigation problem.
Start by writing down the decisions a visitor must make. Walk the route as if you have never been to the venue. Note where a person needs to turn, choose between paths, find a destination, or recognize that an entrance is not in use. A sign is most useful before the decision point, where a visitor has enough time and space to respond.
Then consider the full experience, not one sign in isolation. A guest may need a directional sign at the entrance, another at a path junction, and a confirmation sign near the destination. Consistent colors, arrows, and naming make the sequence feel connected. If one sign says “Main Stage” and the next uses a different label for the same place, visitors may hesitate.
How can you map the route before choosing signs?
Use a simple site map or annotated venue plan. Mark entrances, destinations, turning points, queues, access routes, temporary barriers, vehicle areas, and any locations where people might stop. The map does not need to be a finished design file. Its job is to reveal how a visitor will move and where signs could support that movement.
- Mark the start and end points. Identify where people arrive and the destinations they need to reach.
- Trace each likely route. Include alternate paths for different entrances or event areas.
- Circle decision points. Pay close attention to intersections, building entrances, and places where the route changes.
- Check sightlines. Look for parked vehicles, landscaping, crowds, temporary structures, or other signs that could block a view.
- Identify restrictions. Note walkways that must remain clear and any venue rules about placing signs.
A site walk is valuable because a map can hide details such as a narrow path or an approach that places the sun directly behind a sign. If possible, review the planned locations at the time of day when visitors will use them. Ask venue staff about setup and removal windows, approved sign locations, wind exposure, and whether signs need to move during the event.
For an event with many destinations, assign each destination a short, consistent name before creating artwork. If there is an event map or schedule, match those labels. A sign system can also combine directional graphics with supporting venue graphics, such as floor graphics for event spaces, where appropriate and permitted by the venue.
Which sign format fits a temporary pedestrian route?
A-frame signs are portable, freestanding units with two display faces. They can be useful when organizers need a sign that can be set out for a defined period and moved or removed after the event. A custom metal frame may be considered when the organizer wants a reusable structure or a particular appearance. The final choice depends on the site, artwork, setup plan, and intended use; do not assume that every frame or insert is suited to every outdoor condition.
Compare the format with the route. A low sign may be easy to place but harder to see behind a crowd. A large sign may be more noticeable but take up more space. Some event locations need a sign on both sides because guests approach from opposite directions. Others need one clear face aimed toward a single approach. The sign should fit the viewing angle and the available footprint, not just the dimensions that look best in a design preview.
| Option to compare | Useful when | Questions to ask |
|---|---|---|
| Metal A-frame structure | You are considering a freestanding, portable display for repeated or temporary use. | What are the frame dimensions, weight, finish, folding or carrying method, and compatible display surface? |
| Other portable A-frame format | Light handling or a different budget and setup approach is the priority. | How does it handle the expected conditions, and can the graphics be changed or replaced? |
| Fixed or venue-mounted sign | The location is stable and the venue allows a more permanent installation. | Who approves installation, what mounting method is allowed, and who removes or stores it? |
| Banner or larger graphic | You need to identify a broad area or provide visibility from farther away. | Where can it be installed, how will it be supported, and does the site have clearance or wind considerations? |
This is a planning comparison, not a specification sheet. Ask the print provider to confirm the actual size, material, display method, and suitability of the proposed product. If the event needs multiple formats, a local provider with experience across signs and large-format projects can help coordinate a family of pieces. Review the available A-frame sign options and broader custom sign solutions while preparing your questions.
How should you make each message easy to follow?
Write the message before designing the sign. A useful wayfinding sign generally has one primary instruction, such as a destination and an arrow. Avoid making a directional sign carry a long announcement, schedule, sponsor list, and several unrelated instructions at once. Visitors may be walking, talking, or moving with a group. A sign should be understandable without a long stop.
Use familiar destination names and direct language. Choose an arrow that clearly points toward the route the visitor should take from their current position. Check the direction from the actual approach: a symbol that looks correct on a screen can point the wrong way when the sign is turned toward the path. If the sign has two faces, confirm whether each face needs a different arrow based on the direction of approach.
Plan a visual hierarchy. The destination or instruction should be the most prominent element. Supporting information, if needed, should remain secondary. Use strong contrast between text and background, allow open space around the message, and avoid crowding key details near edges or folds. The organizer should review the final proof at a realistic size rather than judging only a zoomed-in screen view.
Consider the complete sign sequence. Use the same destination wording and visual conventions from the first decision point to the last. If color is used to distinguish event areas, make sure the sign still communicates through its words and arrows rather than relying on color alone. Include a confirmation sign at the destination only if it helps visitors know they have arrived.
What should you compare about frame and graphic durability?
“Metal” describes a broad material category, not a guarantee about weight, finish, weather resistance, or service life. Ask for the specifications of the actual frame being proposed. Useful details may include overall dimensions, weight, how it folds, how it is carried, the finish, the display surface, and whether graphics are replaceable. Find out whether the frame is intended for indoor use, outdoor use, or a defined range of conditions.
Think through the environment where it will stand. A sheltered paved entrance is different from an exposed open area. Wind, rain, uneven ground, heavy foot traffic, and frequent movement can all affect how a temporary sign performs. Ask the supplier what use conditions the product is designed for and what setup practices are recommended. Do not rely on a sign as a barrier or safety device unless it has been specifically designed and approved for that function.
Portability matters, too. The crew may need to move signs during setup, reposition them as traffic patterns change, or store them after an event. A heavier structure may be less convenient to transport, while a lighter one may require extra care in an exposed location. Confirm who handles the sign and how it will be secured or monitored under the venue’s requirements.
For graphics, ask how the printed surface attaches to the frame and whether the art can be refreshed for another event. Reuse can be practical when the organizer repeats the same route, but a reusable frame is only useful if it can be stored and the display can be maintained. If the message changes each time, ask about the process for replacing the graphic and what file or proof approval is needed.
How do accessibility and placement affect the plan?
A wayfinding sign should help people find the route without creating a new obstacle. Check that a freestanding unit does not narrow the clear walking path, intrude into an accessible route, block an entrance, or create a trip hazard. Ask the venue to review proposed locations, especially where the route is narrow or crowds may gather. Keep signs out of curb ramps and areas needed for turning or passing.
Accessible communication also starts with a clear route plan. Do not direct visitors toward steps if an accessible path is available elsewhere. Make sure event staff know the route and can help if a sign is moved or a path changes. Depending on the setting and applicable requirements, organizers may need to review sign placement and other accessibility details with the venue or a qualified accessibility professional. The U.S. Access Board provides information about accessibility guidance and standards; consult the requirements that apply to your specific site and event.
Placement should account for more than the intended line of travel. Check the approach from a seated and standing perspective where practical, look for competing visual clutter, and consider whether a queue could hide the sign. Avoid placing two different directions close together if they may be read as one instruction. If a route changes during the event, assign someone to update or remove affected signs promptly.
What production details should you confirm?
Give the print partner enough information to recommend an appropriate approach and prepare a reliable quote. A project brief can include:
- Event dates, setup and removal windows, and the date signs must be ready.
- Venue address or site plan, proposed locations, and the expected approach to each sign.
- Number of signs, destinations, sign faces, and whether messages differ by location.
- Preferred frame type or material, approximate dimensions, and any reuse plans.
- Artwork, logos, brand colors, destination names, arrows, and the person approving the proof.
- Indoor or outdoor conditions, known exposure, storage needs, and venue restrictions.
- Delivery, pickup, installation, or other handling requirements.
Ask for a written description of what is included in the quote. Clarify whether pricing covers the frame, printed display, design assistance, proofing, delivery, or installation. These elements can vary by project. If you need several signs, provide the full list together so the team can check consistency and identify shared production requirements.
Plan time for copy review and proof approval, not only printing. A late change to a destination name or arrow can affect several pieces. Confirm how changes are handled and whether the final production schedule depends on approval by a specific date. For a complex route or multiple formats, an early conversation can surface questions before event setup approaches. You can also review APM PrintWorks’ creative services if you need support developing or refining the artwork.
How can you estimate quantities and avoid gaps?
Count decision points rather than ordering one sign for every destination by default. A sign may serve more than one purpose only when its message remains clear to people approaching from the relevant directions. On a route with several turns, provide a direction where the visitor needs to choose, then consider whether a confirmation message is useful at the end.
Walk the route and make a sign schedule. Record a sign ID, its location, the exact message, the arrow direction, the number of faces, and who will place it. This gives the design and setup teams a shared reference. It also makes it easier to spot duplicates, missing turns, or signs that point to a route unavailable to some guests.
Allow for operational changes. Events may have alternate entrances, weather adjustments, or temporary closures. Decide in advance who can authorize a change and how staff will communicate it. If the sign system needs to change in real time, ask whether the graphics can be updated quickly or whether staff need a separate approved method for directing guests.
Do a final route check before opening. Follow each direction from the visitor’s point of view. Confirm that signs face the expected approach, destinations use matching names, paths are clear, and no temporary equipment blocks a message. Have another person follow the route without coaching; their questions can reveal a confusing transition that the planning team overlooked.
What should you ask before ordering custom metal A-frame signs?
Before approving a project, use these questions to compare providers and proposals:
- What specific frame and display surface are included, and what are their dimensions and weight?
- Is the proposed unit appropriate for the intended indoor or outdoor location?
- How are graphics attached, and can they be replaced for future events?
- What is the process for reviewing artwork, message direction, and a final proof?
- What quantity and number of faces are included in the quote?
- What setup, transport, storage, delivery, or installation steps are included or excluded?
- What is the production schedule, and when must the organizer approve artwork?
- Who should confirm the route, venue rules, and accessible placement?
Ask for recommendations tied to your specific site rather than selecting solely by appearance. A useful conversation connects the proposed sign to its job: where people will see it, what they need to understand, how the sign will be handled, and what happens after the event.
How can you coordinate signs with the rest of the event?
Wayfinding works best when it supports the broader event environment. Coordinate sign wording with staff announcements, the event map, the schedule, and any directional information shared before arrival. If the printed sign uses a shortened destination name, make sure staff and digital materials use the same term.
Other formats may help identify entrances or event zones from a distance. For example, an organizer might combine a portable sign at a path junction with event banners at a gathering point, provided the venue allows the installation and the messages do different jobs. A banner can help identify an area; a directional sign can tell a person which way to go. Keep the hierarchy deliberate so that large decorative pieces do not compete with the instruction visitors need to follow.
For outdoor locations, compare placement and installation needs across all formats. A yard sign may suit a different location or purpose than a freestanding A-frame, and the venue may have rules for either. Some projects also combine temporary graphics with window graphics or other displays. Choosing a consistent visual system helps guests recognize the event, while choosing each format for its role keeps navigation clear.
Ready to plan your event wayfinding?
A clear route, short messages, appropriate sign placement, and confirmed product details give an event team a stronger starting point. Make a location map, list each decision point, and share the schedule and use conditions before requesting a quote. A print partner can then discuss the frame, graphic, artwork, and production approach in the context of the project rather than guessing from a product name alone.
Share your event sign requirements
With the route and responsibilities settled in advance, your team can focus on helping guests reach the right place with less confusion.