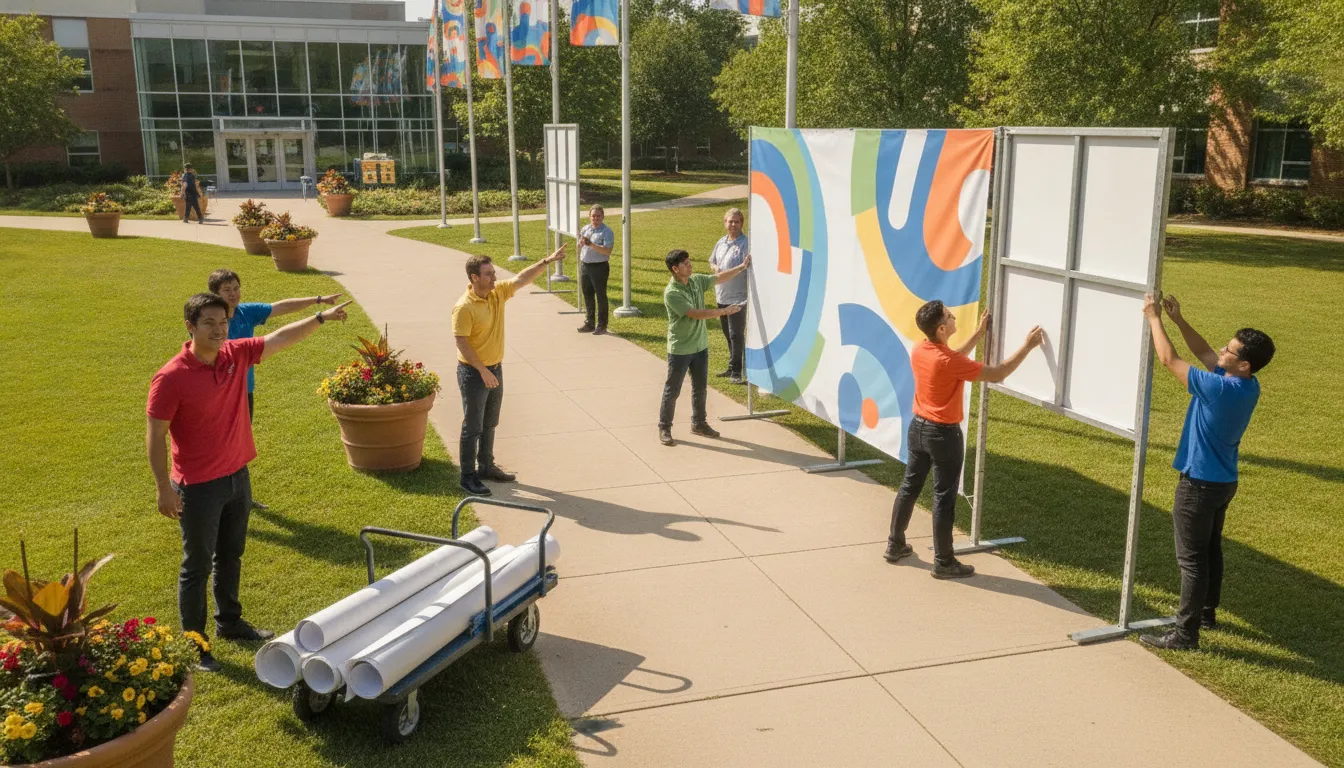
School events often feel disorganized before anyone arrives. A missing directional sign, an overlooked sponsor logo, or a banner installed too late can create confusion for families and extra work for staff. Treat the signage package as an operations plan, not an afterthought.
A school event signage checklist should account for every sign from parking and entrances through check-in, seating, sponsor recognition, and program areas. It should also assign owners and deadlines, confirm materials and installation access, and include a plan for storing or reusing graphics after the event.
Starting with attendee movement makes the process more manageable. Once you know where people arrive, pause, gather, and need direction, you can match each location with the right format, message, and production detail.
What Should a School Event Signage Checklist Include?
A school event signage checklist should work like an operations map, not just a list of graphics. It connects each sign to a location, audience, purpose, installation method, and removal plan. Start by confirming the event objective, venue layout, schedule, expected traffic, and any sponsor or recognition requirements. This gives the team a practical inventory before design begins.
Build the inventory around the attendee journey
Walk the site in the same order a guest will experience it, from arrival through departure. Mark every decision point where people may need confirmation or direction. A venue with multiple rooms, floors, tents, gardens, or parking areas will require a different sign plan than a single-building event.
- Arrival: List parking signs, campus entrance markers, drop-off directions, and any temporary traffic guidance.
- Welcome: Identify the primary welcome banner or sign, event name, host organization, and sponsor recognition that belongs at the main approach.
- Check-in: Add registration or check-in signs, information points, queue guidance, and signs for distinct guest groups if needed.
- Movement: Map directional signs for buildings, rooms, seating, restrooms, concessions, accessible areas, and other high-traffic destinations.
- Program areas: Note signs for stages, activity zones, athletic areas, classrooms, tents, exhibits, or restricted spaces.
- Departure: Include exit markers, pickup directions, thank-you messaging, and any follow-up sign that directs guests to a survey or next step.
Turn the list into a location map
Pair each inventory item with a precise placement and owner. Record the sign size, viewing distance, mounting surface, orientation, material, quantity, and installation or removal responsibility. The venue map should show entrances, exits, seating, restrooms, concessions, accessible areas, and emergency equipment. This step helps prevent a common event-day problem: having the right message printed but placing it where guests cannot see it or where it obstructs a route.
Review the map with the venue contact and event-day lead. Confirm which surfaces can accept mounting hardware, whether stakes or stands are allowed, and who will check signs after setup. For outdoor placements, add weather exposure and a backup location to the checklist. For safety messaging, keep emergency exits and evacuation routes visible and unobstructed.
Finally, group the inventory by production batch rather than by department alone. That makes it easier to proof matching colors, names, sponsor marks, quantities, and installation instructions across the full package. A local Portland-area school or organization can also use APM PrintWorks in Beaverton as a nearby production partner for coordinated large-format graphics and planning support.
How Do You Plan Directional and Welcome Signs?
Plan signs around the attendee journey rather than treating each piece as a separate design request. A useful venue map should identify entrances, exits, seating, restrooms, concessions, accessible areas, and emergency equipment. Then use that map to decide where people need reassurance, an instruction, or a visible landmark.
Start at the arrival point. Mark every parking entrance, drop-off area, overflow lot, and pedestrian approach. Parking signs should be visible before drivers need to make a decision, with arrows or short directions that can be understood quickly. If your campus includes several buildings, fields, tents, gardens, or parking lots, account for each area because signage needs change with the venue layout. Lightweight yard signs can be useful for temporary outdoor directions because they are portable and include an H stake for installation. See APM’s custom signs for sign formats that can support campus wayfinding.
Make the entrance unmistakable. Place a welcome banner or large welcome graphic where arriving guests can see it from the primary approach. Use the school, program, or event name as the visual anchor, then add a clear directional cue if the entrance does not lead directly to check-in. The goal is to confirm that guests are in the right place before they start looking for help. Keep sponsor recognition separate from essential directions so logos or acknowledgments do not compete with the welcome message.
Guide guests to check-in. After the entrance, add registration or check-in signs at decision points, not only at the table itself. Use consistent wording and arrow direction from the door to the check-in location. If there are separate lines for guests, staff, performers, or volunteers, label those routes plainly. A sign that is easy to find from across the entry area can reduce questions for the event team and keep the arrival flow moving.
Continue the route through the event space. Direct attendees toward seating, restrooms, concessions, activity areas, and any separate program rooms. Include exit markers where people will need them, and check that signs do not block walkways, accessible routes, emergency equipment, or required exits. Event safety planning should also clarify evacuation procedures and staff responsibilities, so directional signs support the venue plan rather than contradict it. Confirm accessible routes in the final setup before guests arrive.
Place recognition and welcome graphics with purpose. Sponsor signs can sit near the areas they support, while welcome graphics can frame an entrance, stage, photo area, or gathering space. Keep the hierarchy consistent: directions answer where to go, welcome graphics establish the event, and sponsor recognition identifies supporters. At departure, use an exit or thank-you sign to close the experience and point guests toward the next action approved by the school. Walk the full route before event day, from parking through check-in and seating to the exit, and remove any sign that adds confusion instead of clarity.
This sequence turns the venue map into a practical production list. It also gives the school team a single way to review missing signs before artwork is finalized and installation begins.
How Should Schools Choose Outdoor Event Sign Materials?
Material selection should follow the event environment, not just the design. Start by separating signs that identify a lasting campus space from graphics that will guide visitors for one afternoon. Then review the forecast, mounting surface, expected wind, viewing distance, and venue rules. The ADA sign guidance distinguishes requirements for certain accessible elements and permanent rooms from temporary event messaging, but it does not replace a site-specific review. Confirm requirements with venue officials before ordering or installing signs.
| Situation | Choice | Check |
|---|---|---|
| Outdoor welcome or direction | Outdoor banner or yard sign. | Visibility, stability, permission. |
| Wind-exposed area | Consider mesh. APM offers a 70/30 printable-to-open-area ratio. | Wind, attachment points, venue approval. |
| Portable wayfinding | Corrugated-plastic yard sign with H stake. | Stake permission and clear paths. |
| Indoor or permanent space | Match the display to the surface and lighting. | Mounting, contrast, exits, access. |
Weather and mounting deserve equal attention
For an outdoor program, check the weather report and decide in advance whether to activate a rain backup plan. A separate indoor location may require a different inventory, mounting approach, and route map. A banner that works on a sheltered wall may not be the right choice for an open fence. While a stake-mounted sign may be unsuitable near heavy pedestrian traffic. APM produces multiple banner formats for indoor and outdoor applications, including mesh, pole, over-the-street, feather, and breakaway banners. Review the custom banners options against the venue’s conditions rather than choosing by appearance alone.
Protect routes, exits, and permissions
Use the venue map to check entrances, exits, seating, restrooms, accessible areas, and emergency equipment before placing graphics. Event setup should be complete before guests arrive, with accessible routes confirmed.
Temporary signs posted for seven days or less are exempt from the specific visual and tactile sign requirements described in the Access Board guide. That narrow exemption is not blanket approval for every placement or event. Schools should confirm applicable requirements with venue officials and keep signs, stakes, cords, and supports out of paths, exits, and emergency access areas.
When Should Signs Be Designed, Printed, and Installed?
- Start six to 10 weeks before the event. That planning window is recommended by the Afterschool Alliance for an event with multiple moving parts. Use the first planning meeting to confirm the date, time, location, event goals, expected attendance, and the spaces that need signs. Larger campus programs or events with several venues may need more lead time. At this point, identify the event chair, logistics lead, communications or media lead, and the person managing guests, sponsors, or RSVPs.
- Build the signage scope and assign deadlines. Create one shared list of sign types, quantities, locations, sizes, copy, logos, and installation requirements. Include parking, entrances, registration or check-in, seating, restrooms, accessible routes, activity areas, sponsor recognition, and exits. Assign an owner for each decision, then set deadlines for content, artwork, approval, ordering, delivery, and setup. A written responsibility list helps prevent the common problem of assuming someone else is handling a critical sign.
- Confirm the venue and vendor details early. Review the site map, access points, parking, entrances, emergency exits, and any areas that need to remain clear. Ask whether permits or venue approvals are required, especially for signs placed outdoors. Give the print and installation team the event address, loading instructions, contact names, access hours, mounting surfaces, setup restrictions, and any equipment requirements. Vendor coordination should also confirm the contract, deposit if applicable, arrival time, setup requirements, and primary point of contact. For campus-wide projects, this is a good time to review outdoor banner installation considerations.
- Approve the complete proof before production. Gather final event names, dates, locations, directional wording, sponsor acknowledgments, and brand assets in one review. Check spelling, arrows, contrast, viewing distance, sign orientation, and whether each message matches its placement. Have the person responsible for event operations approve the proof, not only the person who supplied the artwork. APM PrintWorks describes its production model as collaborative planning with budget assessment and mockup approval before execution, which gives the school a defined checkpoint for resolving changes.
- Use event week for confirmation, not discovery. Reconfirm vendors, volunteers, equipment, supplies, venue access, and the final installation schedule. Verify that the site has not changed and that weather plans are understood for outdoor placements. Distribute the final signage map and installation sequence to the event team. If a late copy change is necessary, identify exactly which signs are affected and obtain one final approval before production or reprint decisions are made.
- Finish setup before guests arrive, then walk the route. Place signs according to the approved map, beginning at parking and arrival points and continuing through entry, check-in, seating, activity areas, and exit paths. Confirm that signs are visible from the intended approach, stable, and not blocking sidewalks, doorways, accessible routes, emergency equipment, or exits. Walk the attendee path as if you were unfamiliar with the campus. Correct missing, confusing, damaged, or poorly placed signs before doors open. APM can also coordinate large-format installation for wall, window, and floor graphics when the project requires more than delivered materials.
How Can Schools Reuse Event Graphics After the Program?
The event is over, but the graphics package can continue supporting the school if the team closes it out deliberately. Start by creating a simple inventory before anything is packed away. Record the item name, quantity, dimensions, material, location used, condition, and whether the design includes a date, venue, sponsor, or other time-sensitive detail. A photo of each piece can make the inventory easier to use during the next planning cycle.
Separate the materials into three groups:
- Reusable as-is: General welcome signs, school identity graphics, directional pieces that do not name a specific event, and durable banner formats that remain accurate for future programs.
- Reusable with an update: Sponsor panels, year-specific graphics, schedules, and signs that need a new date, location, partner name, or QR destination.
- Event-specific: Pieces tied to a single program, temporary instruction, outdated information, or a sponsor agreement that has ended.
That distinction prevents a future team from accidentally displaying an old date or sending visitors to an inactive page. It also helps the school decide which components should be redesigned instead of stored. APM produces several banner formats for indoor and outdoor applications, including single-sided, double-sided, mesh, pole, feather, banner-stand, and breakaway banners. The right reuse plan depends on the format, design, condition, and next setting, so document those details rather than assuming every piece has the same service life. See the range of custom banners when planning a repeatable graphics system.
Store the inventory where the next event team can find it, and keep the item labels with the materials. Use the school’s normal facilities or event-storage procedures, without assuming that every material can tolerate the same handling or environment. Note any visible wear, mounting hardware, missing pieces, or cleaning and repair needs so those issues are addressed before the next installation.
Closeout should also capture what happened. Review attendance, feedback, operational issues, expenses, and other lessons while the details are fresh. A post-event checklist should include cleanup, vendor returns, financial reconciliation, thanks to volunteers, staff, vendors, sponsors, and attendees, plus documented lessons for the next program. Thank volunteers within 48 hours when possible. If a post-event sign remains visible long enough to be useful, a QR code can link to a survey or follow-up page. Check the destination before reuse, and update or remove the code when the follow-up period ends. The result is a living school event signage checklist, not a one-time print order: each program leaves behind better records. More reusable assets, and clearer decisions for the next one.
Frequently Asked Questions
How far in advance should a school order event signs?
Start planning six to 10 weeks before the event so your team can confirm the venue, map attendee flow, assign responsibilities, approve proofs, and coordinate production and installation. Larger programs or events with multiple locations may need more lead time. Build the installation date into the schedule, not just the event date, and confirm venue access with the person responsible for setup. The Afterschool Alliance recommends six to 10 weeks of planning.
What signs should a school event have?
Begin with signs that help guests move from arrival through departure: parking, entrances, check-in, seating, restrooms, accessible routes, emergency areas, sponsor recognition, and exits. Add a welcome banner at the primary entrance, then review the route from a first-time visitor’s perspective. A venue map can reveal missing signs around separate buildings, rooms, tents, gardens, or parking areas.
How can outdoor school event signs handle changing weather?
Review the forecast before installation and confirm an indoor backup location for weather-sensitive activities. Choose the material and mounting method for the exposure, wind, and expected event duration. Mesh banners can allow airflow in challenging conditions, while lightweight yard signs with H stakes can support portable directional messaging. Keep signs out of emergency paths and verify that accessible routes remain clear after installation.
What should schools do with signs after the event?
Remove signs promptly, inspect them for damage, and record where each reusable piece was used. Store clean banners and rigid signs flat or rolled according to their material, with labels that identify the program and intended use. Save sponsor and welcome components that can work for future events, and consider adding a QR code to exit signage for a survey or follow-up. Complete a short review while details are fresh, including signs that confused visitors or needed replacement.
Request a custom quote before your next school event
Ready to Coordinate Your School Event Graphics?
A coordinated graphics plan can help your team align wayfinding, sponsor recognition, welcome elements, banners, installation timing, and post-event reuse. APM PrintWorks can review your school event needs and help shape a practical package for your campus program.